I started with food photography when I was doing my internship for Windtown, a hotel located in Brazil and South-Africa. As a young and aspiring content marketer, I captured almost everything that was happening on the hotel’s premises. I dove deep into an online food photography class to learn more about the topic.
And I didn’t dive into just one course. No, I tried many. But most online food photography class videos tackled subjects and skills way above where I was at. Or it did the exact opposite: their tips were pure basics. Not what I needed, not what I was looking for.
I soaked up all the information I could get my hands on. I found that many online food photography class videos tackled completely useless tips and tricks, but okay: I was here to learn. I didn’t have access to backdrops or studio lights or all kinds of extra lenses, so I worked with what I had.
And I’ve stuck to that working method ever since. It’s my preferred way of doing things: just work with what you’ve got. Hence what you’ll find in this Tremento Food Photography – 10 Tips, is not the average ‘Use a softbox’ or ‘Use Adobe Lightroom’. No, these tips are applicable to anyone, no matter your current food photography skills.
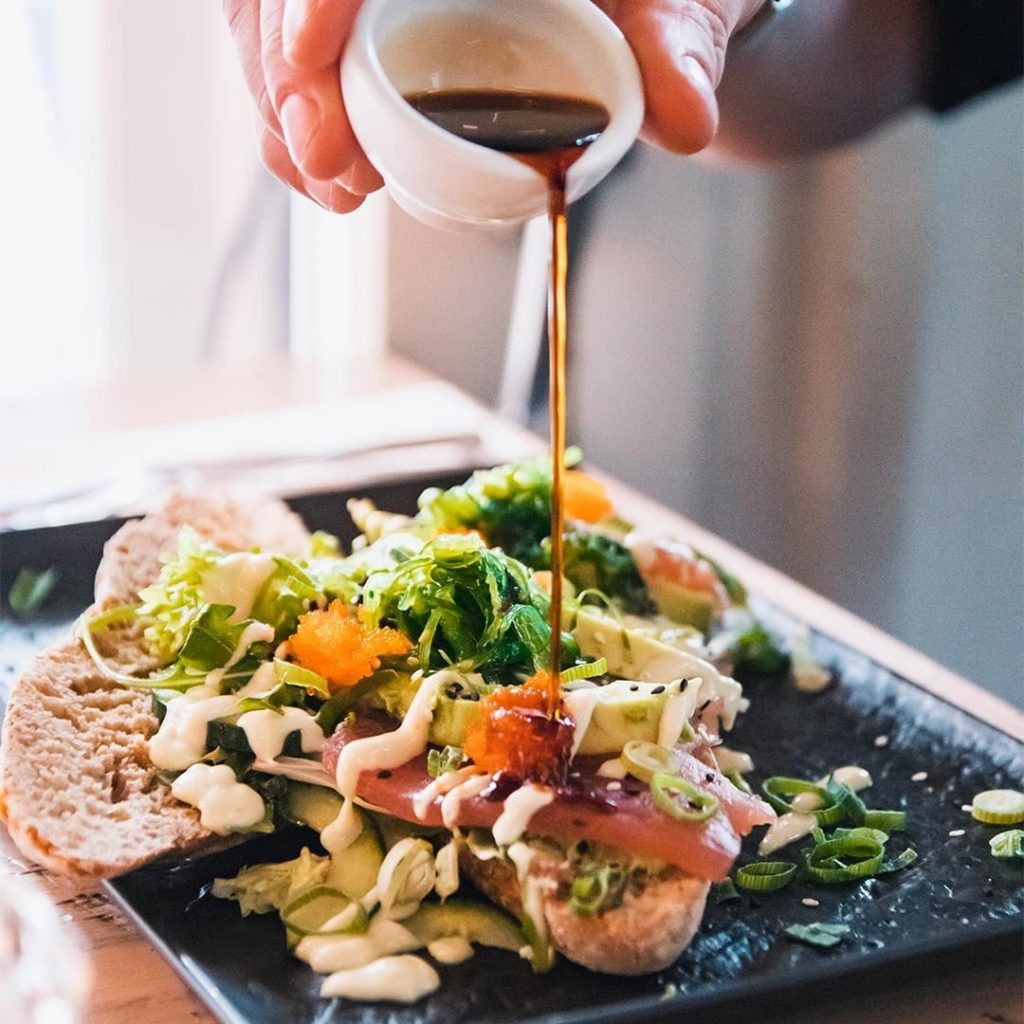
1. Use Natural Light for Food Photography 🌤️
The most important thing when it comes to photography is the light. In order to get a good quality picture, you need to have a sufficient amount of light. Less light means more ‘noise’ in the picture. That’s the grainy effect that you get when you ramp up the brightness afterward.
Lamps may help, but the best light is natural light. So open the curtains and get as much light in as you can. Since we’re talking about food photography here, you should be quite flexible and able to move. Hence my advice to head over to the window and take your photos right there.
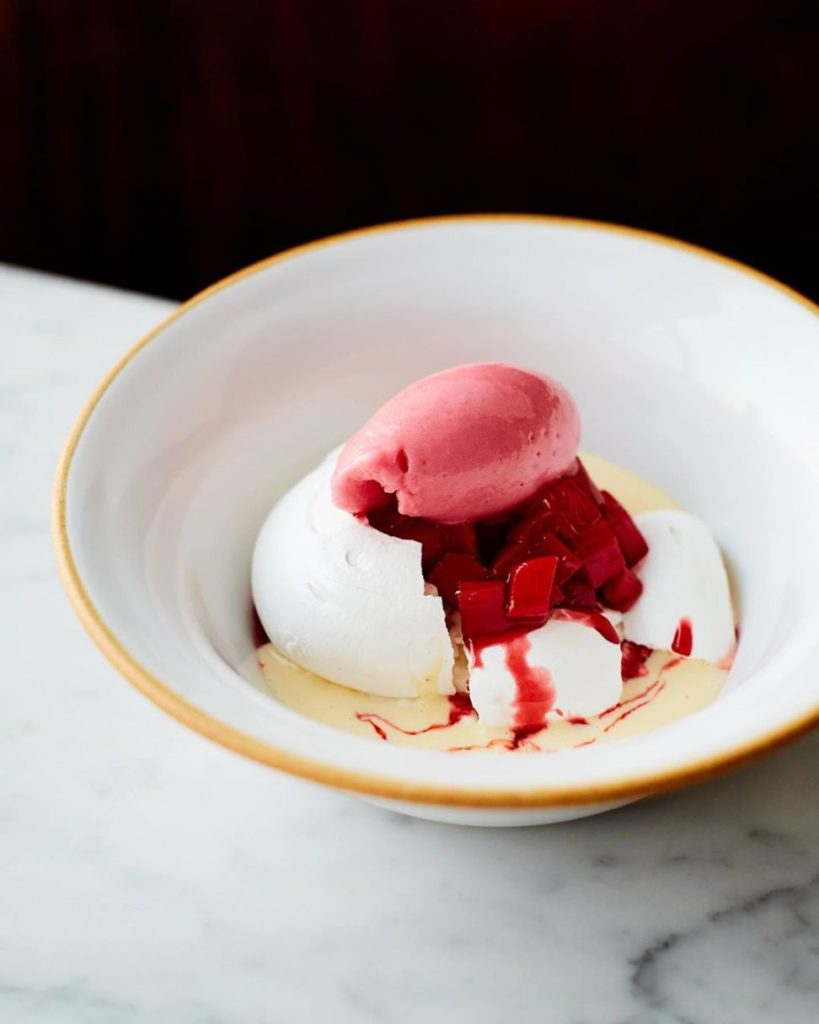
Photographing outside? Great idea, but… super bright daylight can also be too much! Mornings and afternoons are often fine, but when you take your picture mid-day, you might end up with an overexposed shot. So if you want to grab a picture of your lunch, you might be better off in the shadows, indoors, or underneath a parasol for example! 🏖️
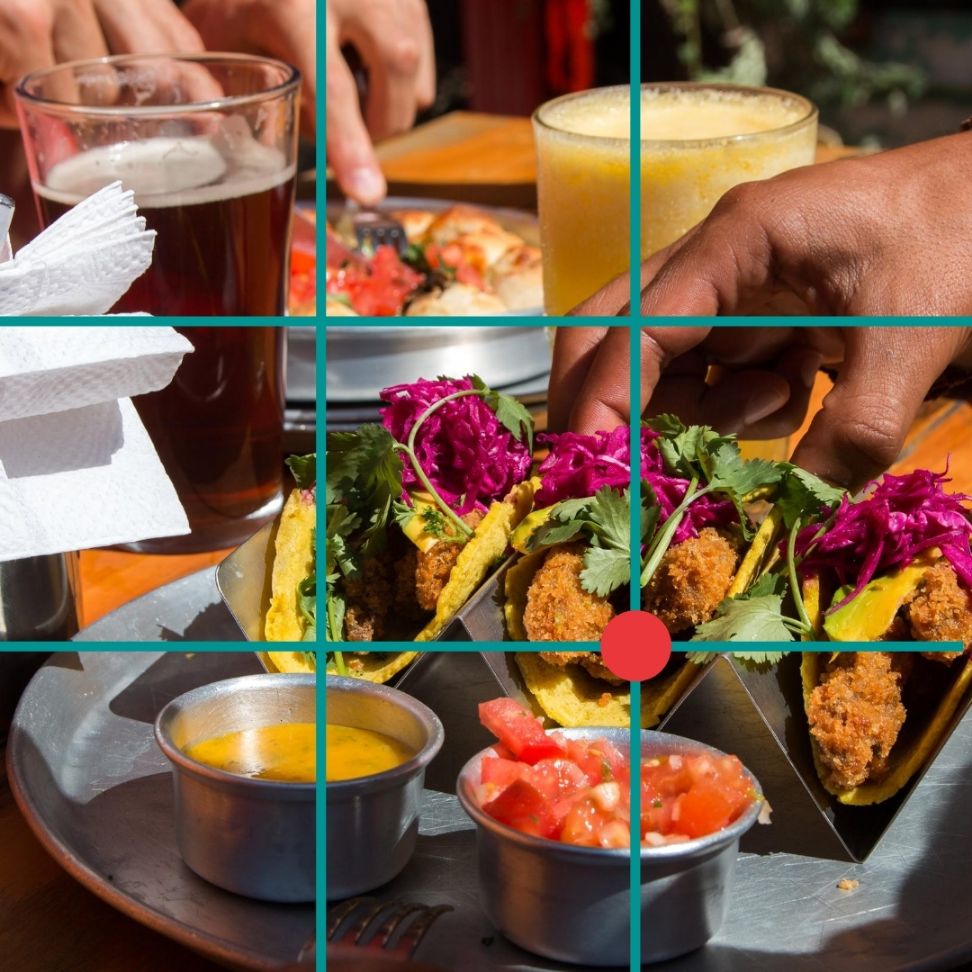
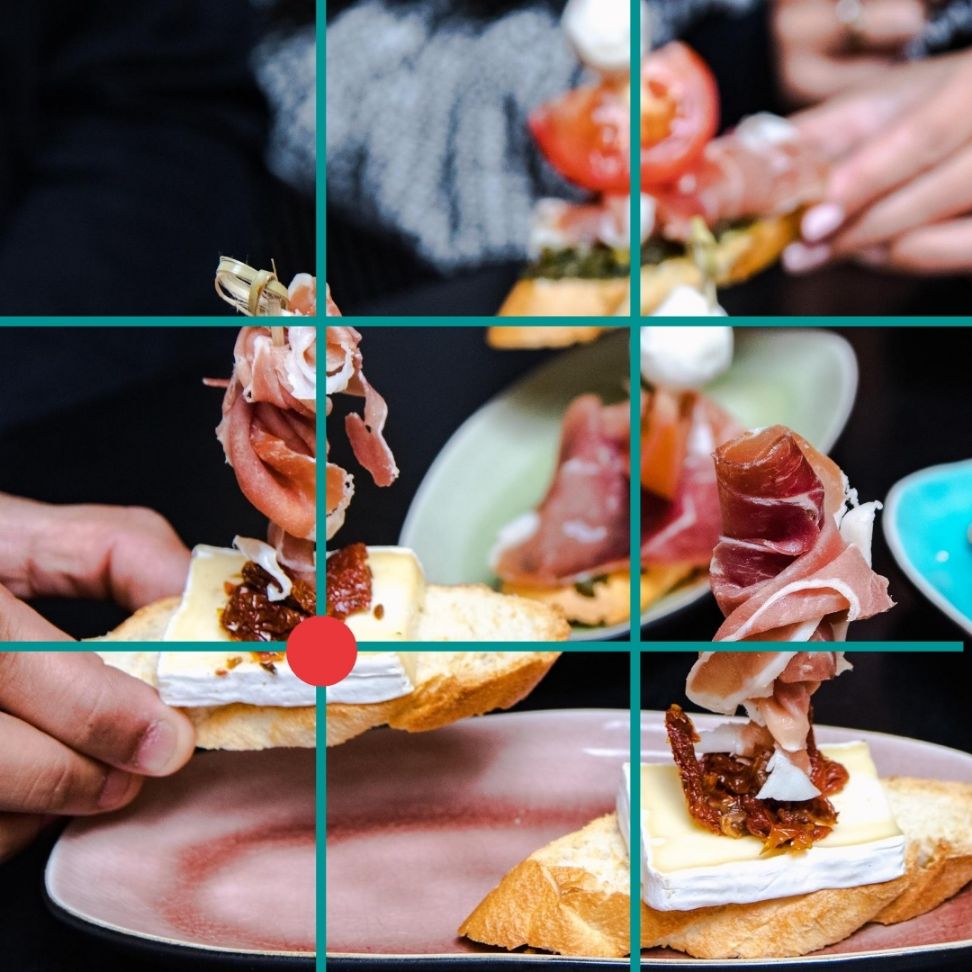
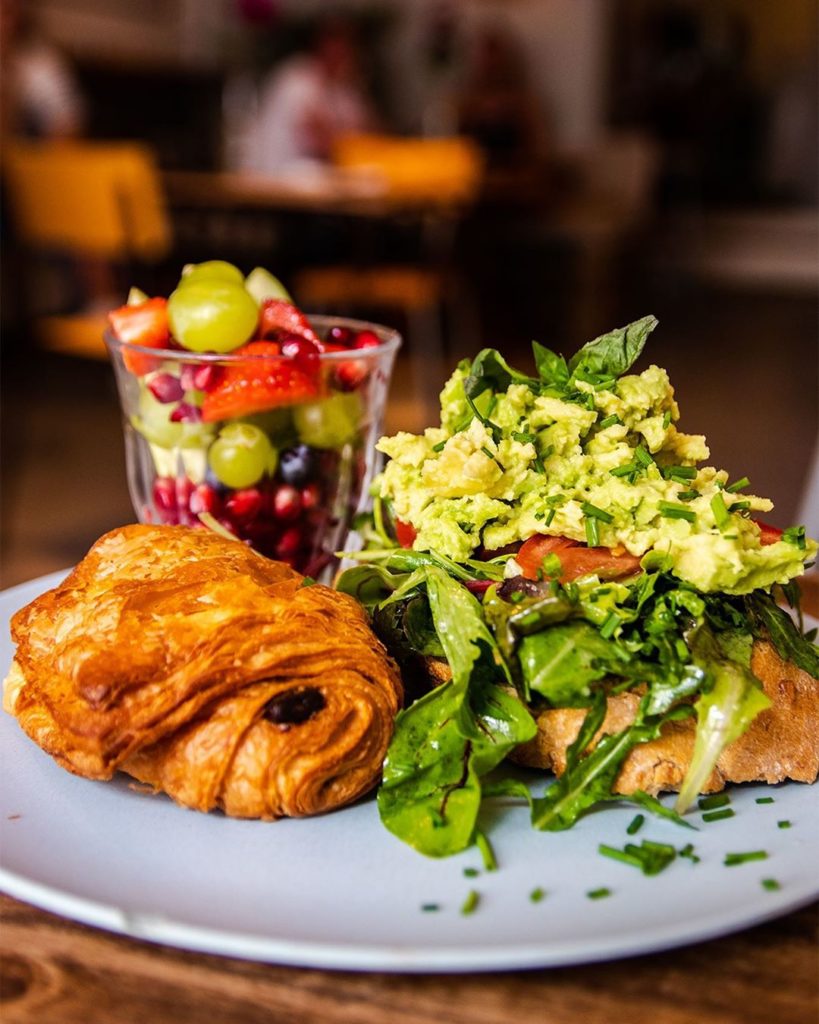
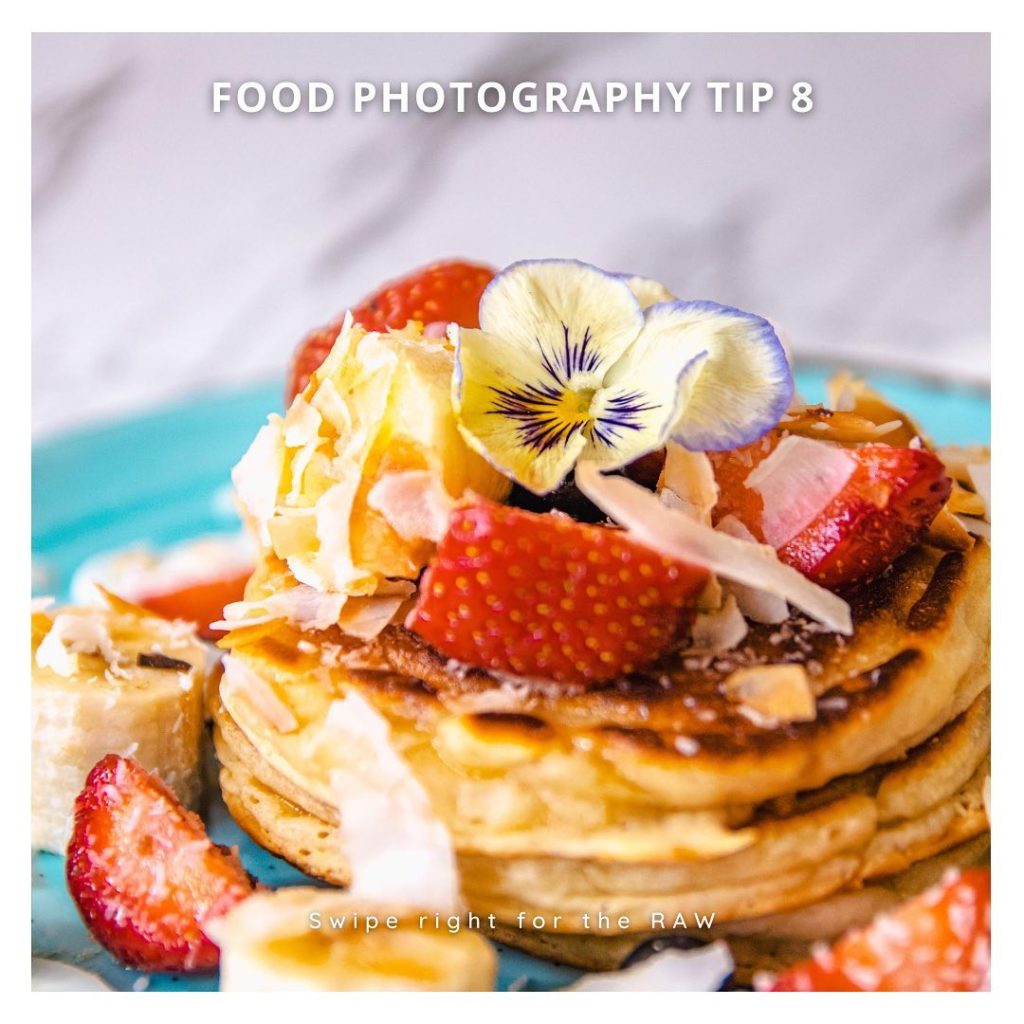
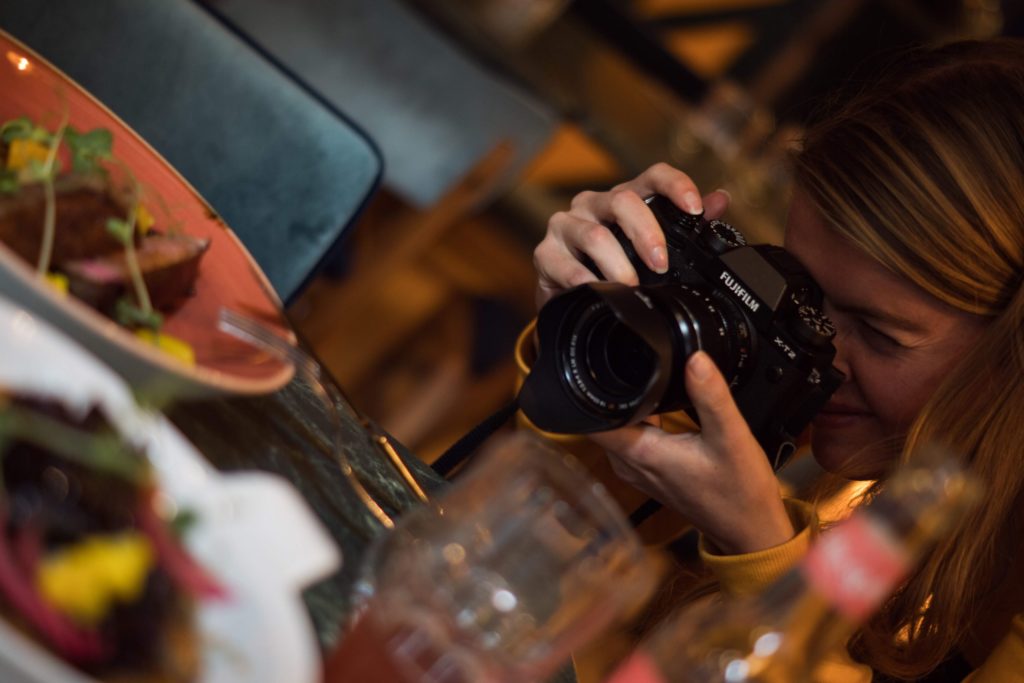
2. Use compositions, like the grid shown above
Aren’t compositions for musicians? 🤔
Eh, NO! No no no!
If there’s one thing I’ve learned, then it’s that composition is KEY to good photography.
There are different ways you can compose an image. To make it easier for you, it’s useful to know about composition rules. One of them is the rule of thirds. Imagine breaking an image down into thirds (both horizontally and vertically) so that you have 9 parts (see picture above).
As you can see there are 4 intersection points (dots in the image). Place the main object near one of those intersection points to achieve a balanced composition. In the photo above, the knife is placed on the dot. Your viewer’s eye will be attracted to the intersection point. You can also use a complete line instead of just the intersection point.
Dit bericht bekijken op Instagram
Een bericht gedeeld door Hospitality & Travel Marketing (@trementohospitality) op
3. Take MANY photos!
It’s one of the biggest mistakes I see aspiring food photographers make 🤭
Not taking enough photos, and just from one side 🤦🏻♀️
Laziness kills success when it comes to photography, especially food photography.
So, always, I repeat, always, try to take photos from multiple angles. Some plates of food look better from above (like, pizza), or from the side (burgers), or at a 45-degree angle (drinks). Move around the plate AND yourself to find various angles and different lighting opportunities. Sometimes you’ll find that a photo looks way better when you move around the table.
Only delete the ones that are complete failures during your shoot. Keep every single shot that you feel slightly happy about. Only once you upload your photos to a computer or once you start editing them (on your phone), is when you’ll see the real quality of the picture. Hence you shouldn’t throw them all away beforehand: you want to be able to pick your favorite later.
Dit bericht bekijken op Instagram
Een bericht gedeeld door Hospitality & Travel Marketing (@trementohospitality) op
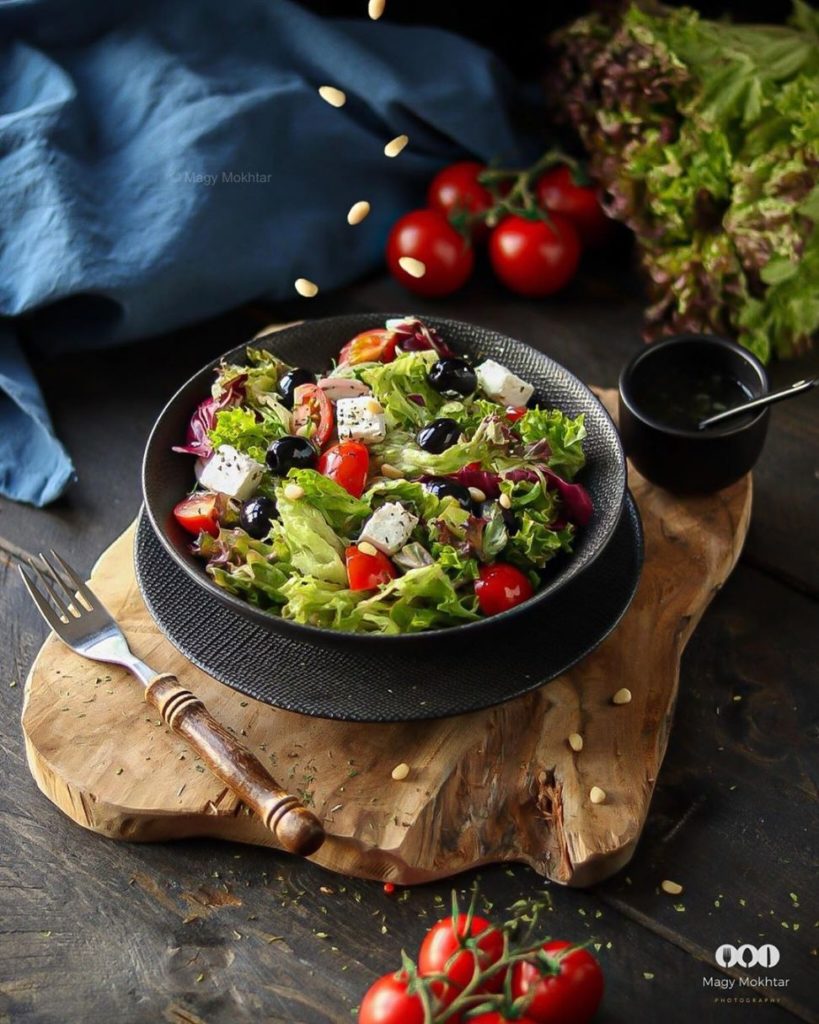
4. Use multiple layers for food photography
Time to layer-up, friends 🙏🏼
I already told you about shooting from different angles, but we didn’t talk about heights yet. Creating various levels in your photos will make your photos much more interesting.
So, how do you do this? Well, what about:
- Place something on a cake stand
- Use a cutting board to raise up some items in your scene
- Use different sized glasses
You can also place things on a wrinkled kitchen towel to create texture. It’s good to break up the scene by creating visual differences and layers.
Need some inspiration? Check out these accounts, from people who’ve nailed the art of food photography! 📸🙌🏽

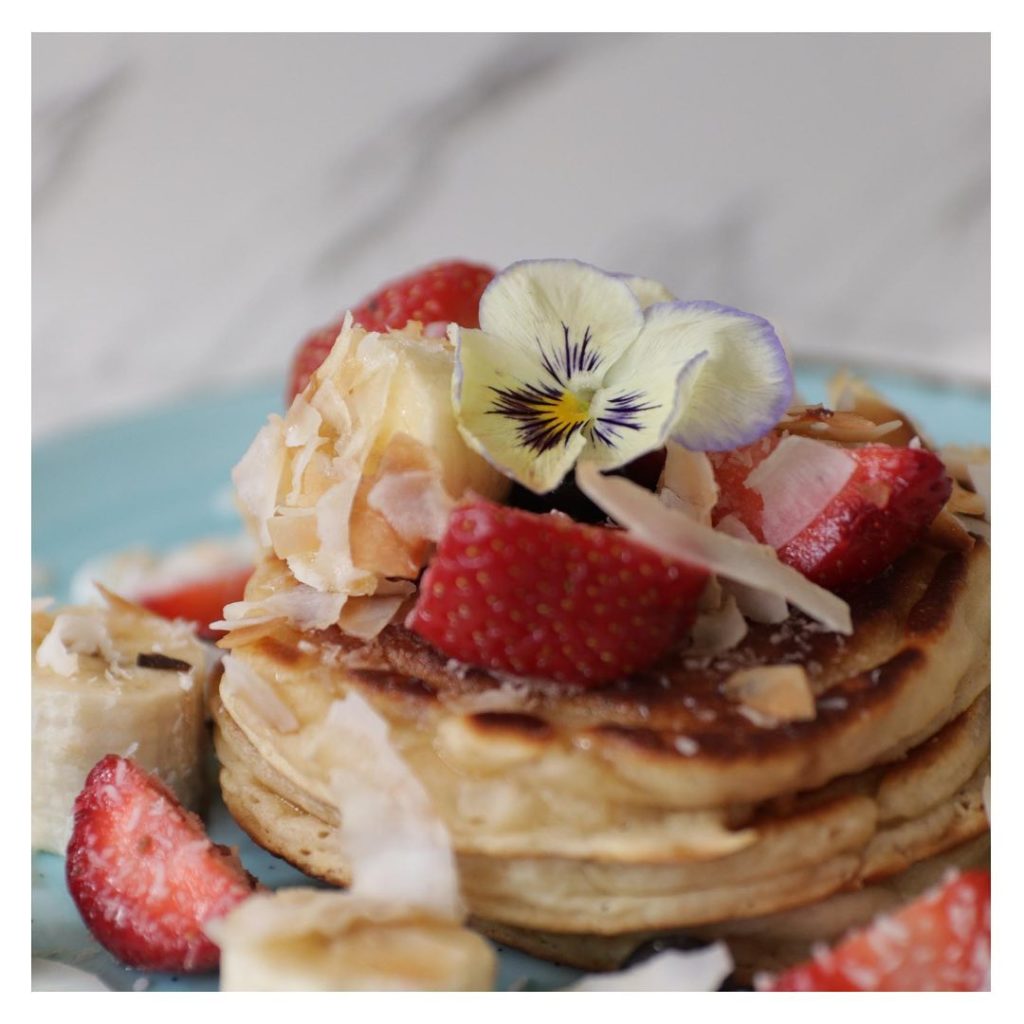
5. Clean up the clutter 🧼
Adding props and decorations to your food photos is a great idea. But if that flower, napkin, or cutlery doesn’t add value to the photo, it detracts the attention. Focus on what is most important. But… don’t zoom in too close. You want your viewers to be able to tell what the food is.
So ask yourself the question: does this enhance what I’m trying to photograph, or does it clutter the image?
I’ve said it before and I’ll say it again in this ‘food photography class’: look at what others do. How do they set the table? What kind of props are they going for? This is a tip that deserves a spot in this series on its own, and it’ll sure get it, but I did want to point it out already 🙌🏽
Dit bericht bekijken op Instagram
Een bericht gedeeld door Hospitality & Travel Marketing (@trementohospitality) op
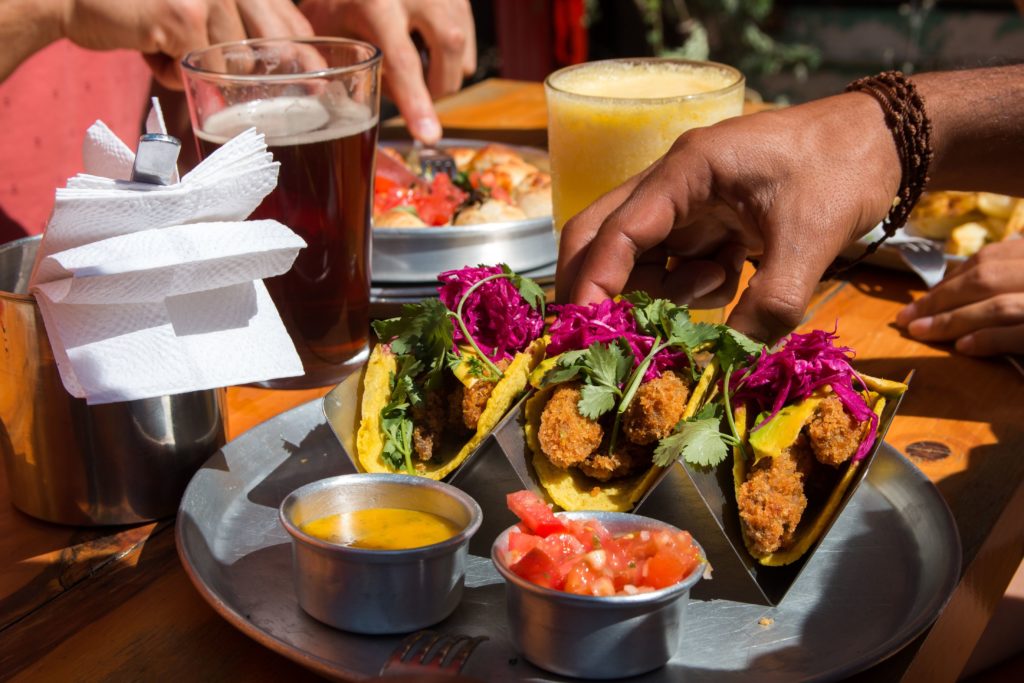
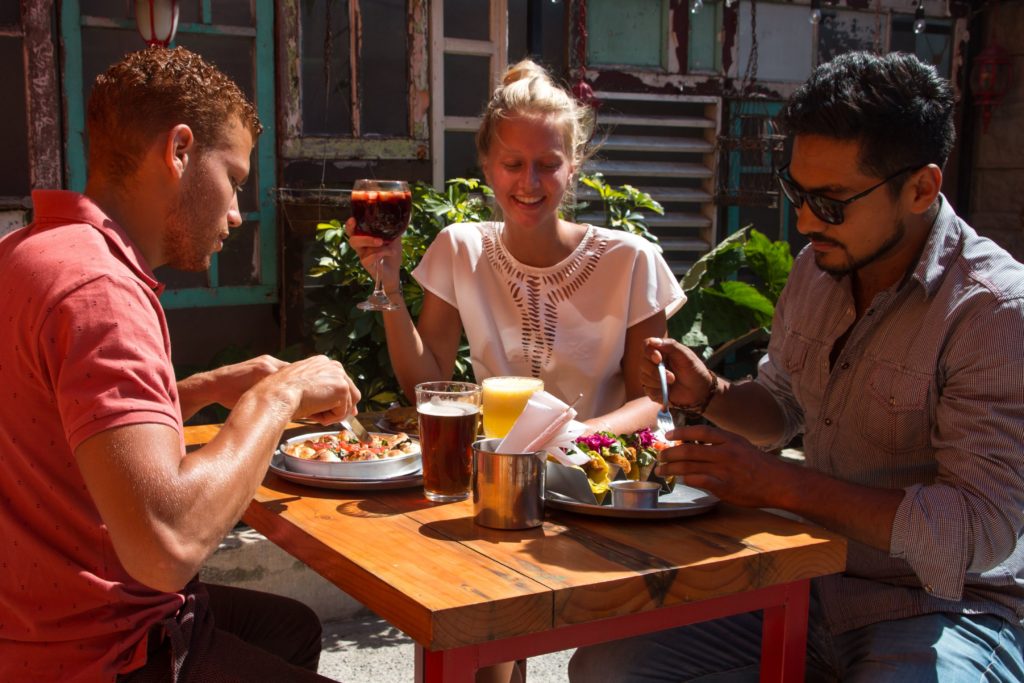
6. Show people in your food snaps
Where them people at? 🔥
Yes, time for tip number 6, my friends! Bring in the people!
I often come across a restaurant, café, or hotel feed that features solemnly their food, interior, and exterior. No people to be seen.
But… your followers want to imagine being at your place. They want to be able to daydream, to fantasize what it’s like to be THERE.
And so does Instagram: Instagram LOVES faces. Preferably happy faces. A smile works wonders for the algorithm 👀
Besides that, adding people to your food pics makes your photos a whole lot more dynamic. Just the food becomes pretty static. I feel like this only works if you focus on purely portraying food in your feed and nothing else (ever). Like some food bloggers/photographers do (want to be wow-ed? Look at @sobereel and @delaram.kln), or super high-end restaurants.
For the latter, people are searching for ‘exclusivity’ and an empty restaurant or solemnly food photos may imply this feeling. And that’s why, for them, this may work.
However, to 95% of you, I’d highly recommend inviting people into your photos. It’ll give your profile and the engagement a guaranteed boost! 📈
7. Be authentic 🤙🏼
The next tip in my 10 food photography tips is one shared by Julie from @inspiringkitchen. I recently featured her in a blog post on the website, which is a short but informative interview with Julie herself 💕
Her tip? Be authentic. “I don’t eat meat. I was told by a bigger Instagrammed/photographer that, for my Inspiring Kitchen Instagram, I should show everything, even if I don’t eat it. I couldn’t figure out how I could do that since I had never eaten it. How do I tell people it tastes good when I didn’t even try?” 🤔
I think many people can relate to this. I was recently asked to work for a shoarma place – but I am a flexitarian myself and eat meat only on a very rare occasion. Doing a shoot at this meat-focused restaurant just didn’t feel right. 🤷🏻
8. Editing makes a photo fake 😤
That’s such – sorry to use the word – bullshit. It doesn’t. When you take a photo, whether that’s with your phone or a professional camera, it is always manipulated. No matter whether you edit the photo afterward or not 👀
But yes: we can overdo it. And many people do. I’m not going to say that that’s wrong. It’s a choice. Some food photography accounts are packed with images that literally pop off the screen, and I must be honest: it does grab the attention. And on social media, you need to pop out from the crowd ⚠️
HOWEVER, there’s one HUGE mistake we, as hospitality brands, can make. And that’s creating WRONG expectations. That’s why I always try to photograph the food at my clients exactly the way it comes out of the kitchen. No extra additions to the plate. Yes, we can add props to the scene, but not to the food.
Why? Because we don’t want people to feel deceived when their food comes to the table and it looks less appetizing than on the photos they’ve seen before. So what do we want?
We want the food to look superduperdelicious, and then get that on camera. Meaning: the first step is done ‘in real life’, and not when the photo’s made 📸
So in this food photography class, I’d like to say there are 3 steps to quality:
- The plate itself and the food need to look great – and REAL
- The photos need to be shot from various angles and with plenty of light, so the best ones can be chosen to be used
- And then: they need to be edited. Decrease some shadows, up some ‘whites’, add brightness and contrast, and vibrancy where demanded.
So, does editing make a photo fake? No, in my opinion, it doesn’t.
9. Find your food photography inspiration 👀
It’s another mistake many of us make 🙈 We look at other people’s images and we take our own – but we don’t actually try to LEARN from other people’s work. So tip #9? Be inspired and learn from others. Analyze the work of those who’ve got their food photography mastered.
@thebiteshot would be the ultimate example. You can find many useful and helpful tutorials made by Joanie on YouTube. But don’t just take it from the pros. Look at accounts in your Instagram feed, at the ones from other restaurants, hotels and BnBs. Which photos grab your attention? Which ones could you recreate in your own way? 📸
So my actionable tip for today:
- Look at a couple of Instagram pages that you like
- Find the photos that catch your eye
- Save them – either on Instagram or take a screenshot
- And use the photo as inspiration for your next food photo
10. Practice makes perfect better 🎉
Never stop learning. The last tip in this food photography class is to keep practicing as much as you can.
Take photos with your phone from your own breakfast, lunch, and dinner. Edit them on the go. Rent a camera someday if you don’t have one. Learn how to use different functions and dials. Install various editing apps and software to discover which one works best for you. And so on.
Listen to podcasts, look up more tips, and stay inspired. Share, and ask for feedback. Don’t be afraid to get criticized, but listen to what others say. Learn, learn, learn. Be like a child: a sponge sucking up new information.
That was my quick, small, actionable Food Photography Class for you!
I hope you’ll find these tips useful. If you ever need any advice, then feel free to tackle me on Instagram via the DM. I’ve got much more content like this coming in the future, so stay tuned!